Non-Blocking Delay
In this tutorial we are going to see how to blink lights, and more generally, how to repeat certain actions at given intervals, without using the delay() command.
There are situations where we want to use the delay() command because we really want to keep our arduino from doing anything else, for example, while waiting for the serial port to initialize, or waiting to connect to a WiFi network.
Otherwise, we want to avoid using the delay() command, specially in our loop() function, because it stops the arduino and keeps it from doing anything else. The arduino won’t read input pins, receive data from the serial port, or do any computation while a delay() command is running.
And that is not the situation we want for a microcontroller that we are programming to interact with the physical world in real-time.
We’ll start by considering this simple circuit with \(2\) resistors and \(2\) LEDs:
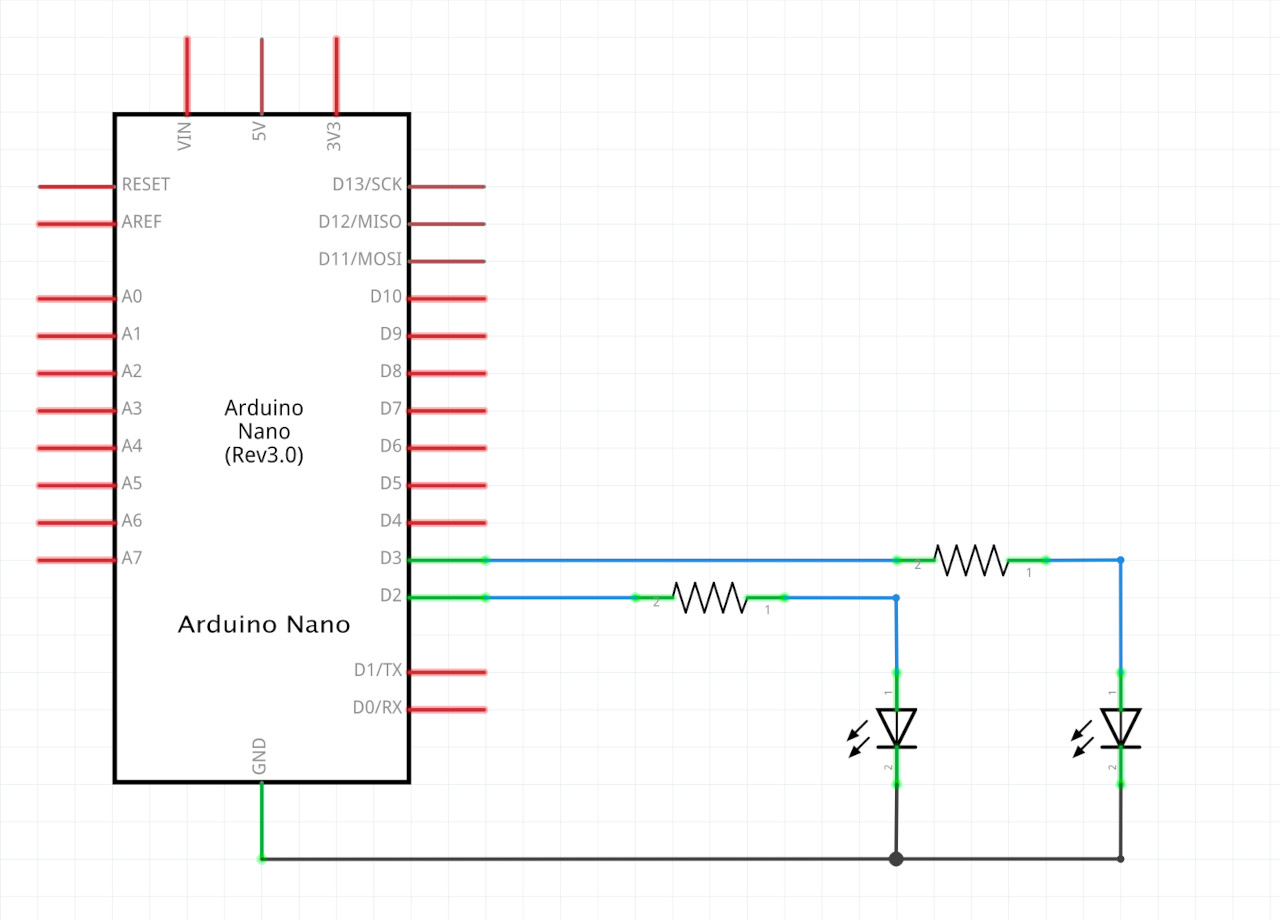
Board view:

The code we will start with is very similar to the Blink example that comes with the arduino IDE, it turns the LED on, waits \(600\) milliseconds, turns it off and waits another \(600\) milliseconds.:
Now, let’s add some code to calculate the time that the arduino takes to execute a loop() without any delays:
void loop() {
  long t0 = micros();
  digitalWrite(PIN, HIGH);
  digitalWrite(PIN, LOW);
  long d0 = (micros() - t0);
  Serial.println(d0);
}
The micros() function is just like the millis() function, except it keeps track of the number of microseconds (\(10^{-6}\) seconds) that have elapsed since the program began running.
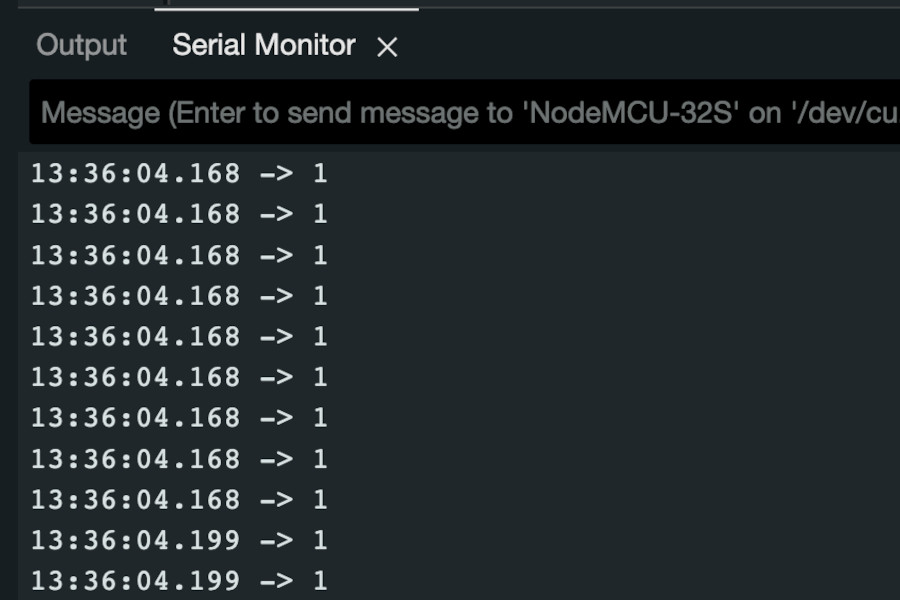
If we run this on an arduino UNO board, we get the following in the serial monitor:

Which means our loop is executing once every \(8\) microseconds, or \(125,000\) times per second.
In an arduino with the esp32 core we get:
Which is \(1,000,000\) times per second.
When we add a delay(1000) to our code, we are making our arduino run \(100,000\) to \(1,000,000\) times slower, for no reason.
Let’s see how to refactor the code to get rid of the delay() commands.
We know that the loop() function keeps executing nonstop, and we have the millis() function that keeps track of the the running time since the beginning of our program. What if we added a variable to keep track of the next time our LED should update? Then, in our loop() we can use millis() to see if it’s time to update the LED, and every time we update the LED we would also set a new update time. Something like:
if (millis() > nextUpdate) {
  digitalWrite(PIN, value);
  nextUpdate = millis() + DELAY;
}
Since we won’t know whether the LED is on or off, we will need to add another variable to keep track of its value, and toggle it at every update. Something like this:
Seems to work the same way, but now without blocking, which means the arduino can receive inputs, process data, send serial commands, etc during the times when it’s not actually turning the LED on or off.
Next we’ll look at a blinking sequence that is made up of different delay values.
This code makes the LED give a quick blink, then a slow blink, then another quick one before starting over:
If we sum the delays in the above code they add up to about \(3\) seconds. This means that if, in addition to blinking this pattern our arduino also had to send or receive serial commands, or read values from its input pins, it would only be able to do that once every \(3\) seconds, while not stuck doing the blinking.
We’ll use very similar logic to remove the delay() commands from this code.
In addition to the variables that keep track of the current LED value and the next update time, we’ll also need a variable to keep track of the current delay amount. Then, every time we update the LED value, we calculate the new update time based on this delay value, and update the delay value for the next update.
Something like this in pseudocode:
if (millis() > nextUpdate) {
  digitalWrite(PIN, value);
  nextUpdate = millis() + delay;
  delay = nextDelayValue;
}
And in real code, we add an array to keep track of the delay amounts for the sequence:
More variables and a little bit more housekeeping, but our arduino can now blink the pattern and do other things at the same time.
Now suppose we want to use delay not just to set the timing of when an LED should turn on and off, but also to set the timing between turning on and off different LEDs.
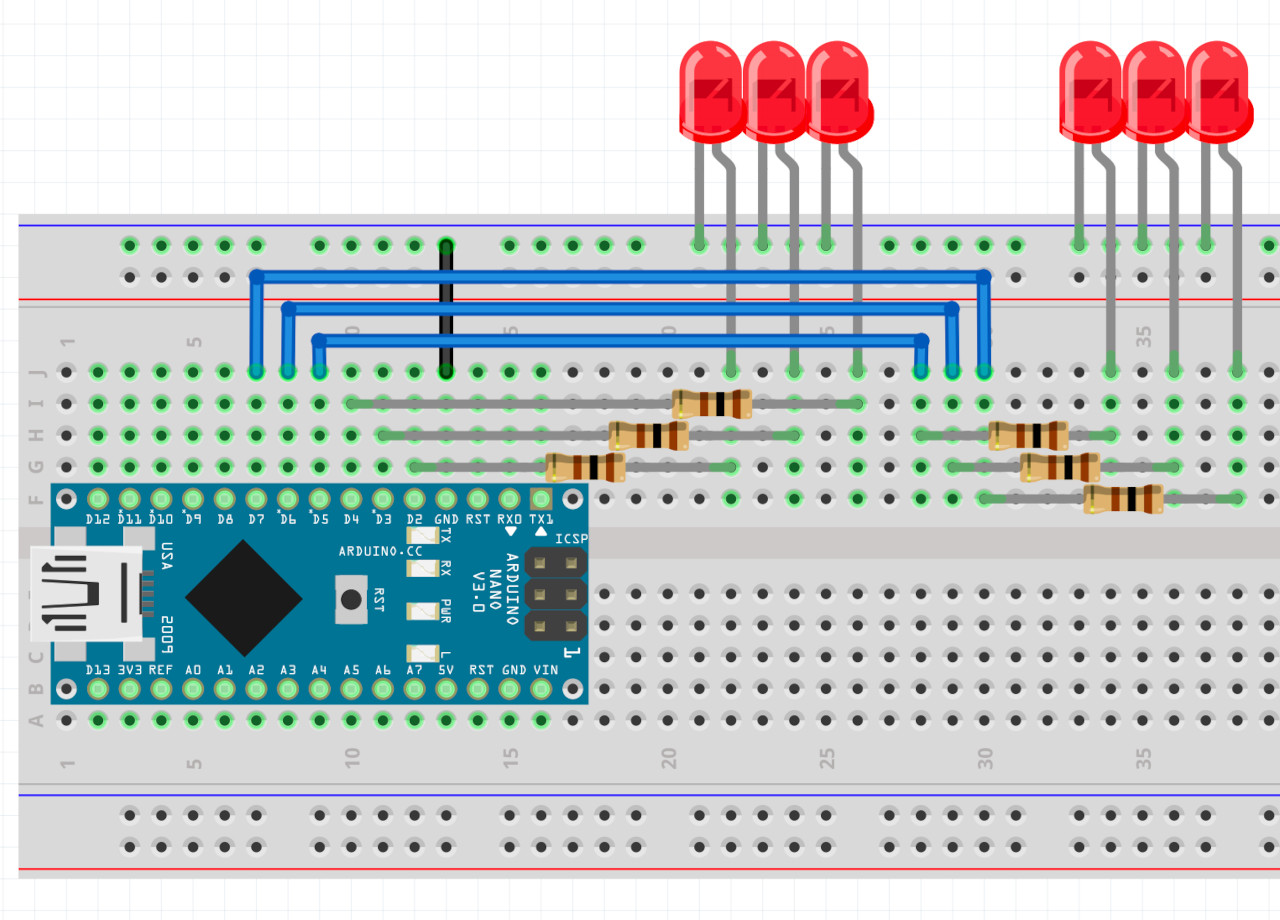
Let’s consider the following circuit and the code necessary for turning on all of the LEDs in sequence (\(D2\) \(\rightarrow\) \(D7\)) before turning them all off:
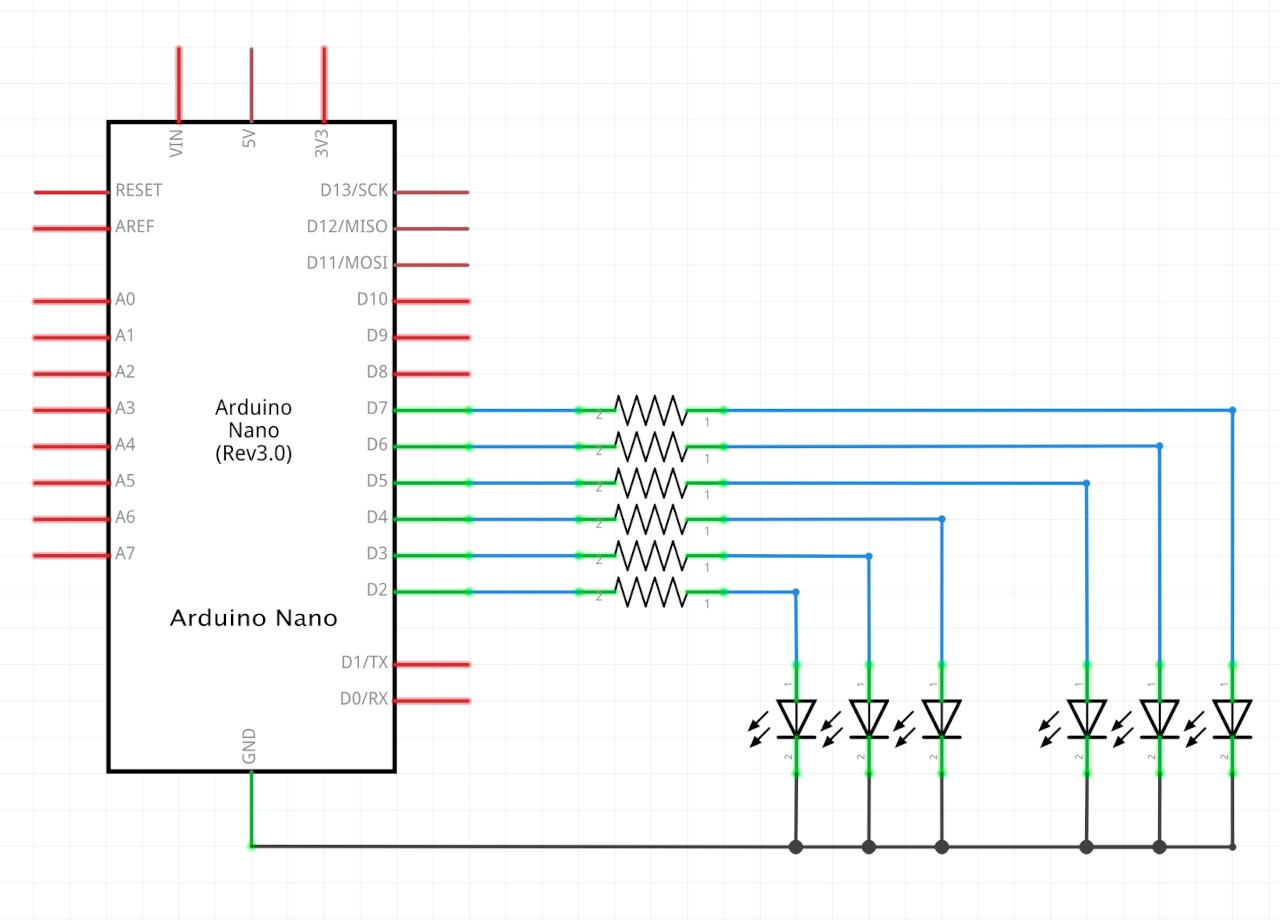
Board view:
The code uses a for loop to iterate through the pins and turn them all on with a short delay between each LED. Once they are all on, there’s a longer delay before a similar for loop turns off all of the LEDs:
The process of refactoring this into its non-blocking version is similar to the previous ones: we need variables to keep track of the next update time and the current value of the LEDs (whether we are turning them all on or off). In addition to those variables we also need a variable to keep track of which LED we will update next, and a way to know when we have updated them all.
Some pseudocode like this:
if (millis() > nextUpdate) {
  digitalWrite(PINS[currentPin], ledValue);
  currentPin = (currentPin + 1) % PIN_COUNT;

  if (currentPin == 0) {   // back to first LED
    ledValue = !ledValue;  // toggle on/off value
  }
}
Can become code like this:
Which looks just like the blocking example, but with an inverted pin order, so we don’t get our sketch codes mixed up.
We’ve seen how to un-block code that blinks an LED constantly, blinks an LED with specific blink patterns (sequence in time) and also blinks multiple LEDs in a specific order (sequence of pins).
Other situations can be made non-blocking using similar logic, and if the sequences get too complex, or there are too many LEDs to consider, we can always use a class to abstract away some of the details and hide the messy sequence arrays.